In the online course I am taking, "The Art of Wild Abandonment", there was a prompt involving a vase of flowers, this is my take on that prompt:
One of the girls used a pretty kraft colored Tazo outer tea bag packet as a vase. Well, it just so happens that I've been collecting the outer tea bag packets of the teas I drink made by Stash because the colors are so vibrant and pretty. I used mine to make the flowers!
The blue background is Tim Holtz "faded jeans" Distress Stain mixed with Mod Podge, after painting it on, while it was still wet, I pulled some of the paint off with bubble wrap leaving little circles of white. The darker blue element on the bottom left is the same Distress Stain only mixed with Liquitex Modeling Paste. I applied it to a plastic doily by Tupperware and "stamped" it on to the canvas. The herringbone is done with "picket fence" Distress Stain dabbed through a Balzer Designs for Crafter's Workshop mini Herringbone stencil.
The lace is new but aged with TH Distress Stains. The flowers are shaded with india ink using Faber Castell Pitt Pens. The little bird cage is from an Etsy shop which no longer carries them.
The paper I used to make the vase is by Making Memories from their Vintage Findings collection and the metal filligrie embellishment on the vase is from "The Funkie Junkie Boutique". I colored the metal in a random fashion with a blue Copic marker #B29. Linda, aka "The Funkie Junkie" has loads of awesome vintage inspired items and also great products to use on your mixed media projects - so check out her store! She also runs a challenge blog called "Frilly and Funkie" which is lots of fun to play along with. I am entering this canvas in her Sunday Share linky party.
This is how the back of the piece is finished:
This canvas is for sale for $35 plus $10 shipping, please e-mail me if you'd like to purchase it!
This week at Frilly and Funkie they have a photo inspiration seen here:
The colors reminded me of a die cut that's been in my stash waiting to be used. I added some color and shading to the die cut with Tim Holtz Distress pens and Faber Castell Pitt pens. I colored a manilla tag with a few colors of TH Distress stains then laid a pattern on it using Balzar Designs stencils and TH Distress inks. After I pushed the ink through the chicken wire stencil, there was a lot of ink left on the stencil so I quick opened my art journal to a blank page and pressed the excess ink on to the page. WhhEEEEEE! LOVE! oh happy day - that came out cool! So I did the same thing with the herringbone stencil! I did some stamping with a Studio G stamp and black StazOn ink and laid down some KandCo rub-ons. A TH reinforcer, Kaiser craft pearl, and some ribbon from the stash and now, what was going to be a diecut on a tag, is a pretty journal page! I'll probably add some words to it when the right ones come along but for now I'm very happy with it!
If the photo or my project inspire a project for you - go create! Then link it up at Frilly and Funkie!
I mixed burgandy and red paint together with modeling paste and spread it through a stencil onto a non stick mat. After the hearts were dry, I mixed green paint into some modeling paste and pushed it through the Leaf Grid stencil by Crafter's Workshop directly on to the heart. I then added the pearl embellishment by Making Memories. This was a fun, easy technique that I will be using again!
Here they are on my layout. In the upper left corner of the layout are more leaves done directly on the paper using the same technique. The portrait is of my gorgeous daughter Robin and her awesome husband Bryan taken on a cruise they went on to celebrate their 5th anniversary. This layout is the scrapbook side of my June 366 Art Journal/Calendar project. If you are unfamiliar with this project, see the original post here. This project has taken on a decidedly scrapbooking quality and I must endeavor to make July's spread more art journally!
Here is the Calendar side:
You can check out other artists ideas on this project at The Kathryn Wheel. and the full spread:
Be sure to hop over to Frosted Designs and check out what the rest of the team members have created to inspire you! Make your own embellishment and link it up to be in the drawing for a great prize!
WOW! Thanks so much to all of you for the lovely comments! I'm glad you love my space - I do too!
So - no random number generator thingy for me - nope - I did the good old cut the names out and stir them in the colander thingy! And the winner is Sandee!
sandee said... I love all the space you have, and your organization, my favorite
though is that dress form, loving it! waving hi from the hills of North
Carolina :)
June 16, 2012 12:26 AM
Sandee - e-mail me and let me know if you'd like the Brights Prize or the Browns Prize - tgfenster (@) gmail.com
But Wait! I am so thrilled with the response and thankful for the ladies who purchased Vintage Paper Packs from me that I am awarding a second prize! Those who purchased paper packs were entered in a second drawing and that winner is Lori Williams!
After Sandee lets me know whether she wants the Brights Prize or the Browns Prize, I will send the other out to Lori W!
Thanks again! I appreciate all of you so much, I will try to visit each of you and hope you'll visit me again soon!
How fun is this! The design team from Frosted Designs is having a blog hop of our crafting spaces!
Welcome!
If you came from Ann's blog then you are in the right place! If not, you'll want to start at the beginning of the hop at the Frosted Designs blog.
Be sure to stop by each of the designer's blogs on the hop and leave a
comment, then leave a final comment on the Frosted Designs blog. Some of
the designers (including me!) are giving prizes and there will be one
from Frosted Designs too! Be sure to check each blog again on Monday the
18th to see if you've won!
Be prepared for a photo heavy post -
I've a gorgeous studio to share with you!
After
my girls married and moved out, my husband and I moved our bedroom
upstairs and turned the master bedroom on the main floor of our home in
to my studio. It is an awesome space and gets a LOT of use! All of the
furniture is from Ikea, the window treatments are from JC Penney. I
purchased a bedspread that matches the curtains and used it to make the
chair covers and the cover for my rolling paper cart. The track lighting
is from Home Depot. Everything on the walls was made by my husband and
I.
Come on in~
take a tour of the perimeter first~
My
big punches are in a shoe holder in the left of the picture above. It
is the kind that hangs on the back of a door but it got so heavy it
pulled the door off the hinges (OOPS!!) So my husband put a piece of
molding up and attached it to the wall.
Here are some close-ups:
I like to have as many of my supplies behind glass as possible (less dusting!)
This cabinet has all of my cutting supplies
in it as well as my Xyron machines and the black binders with my
rub-ons and letter stickers. I try to keep the top clear so I can get
what I need, use it, and put it right back!
This is the bulk of my paper, I keep it behind closed doors so it doesn't get faded.
"There's always time to create"!
This is the shelf I use for taking pictures
of my projects, there is a lamp on a swing arm (in the upper left
corner) that I can pull down to get direct lighting. It is at the
perfect height for me to get a straight on shot. The antique cabinet
came from my husband's grandmother's house and I believe it was
originally in a post office.
I love having my table "floating" in the
room, the windows let in tons of light and all of my "stuff" is within
easy reach. (That's my adorable grandson Jacob playing nicely while
MomMom was taking pictures!)
"vintagy" stuff
Jakey got tired of this whole process and took a rest!
You are probably tired of pictures too so . . . .
Now - on to the prizes! Leave a comment on
this post for me, I will do a random draw on Monday afternoon of all the
entries and the winner will have a choice of either the "Brights" prize
or the "Browns" prize pictured below! Extra Entries !!! :
Anyone purchasing a Vintage Paper Pack from me during the hop will get
THREE extra entries in the drawing! You can see and purchase the Paper
Pack on this post. (Leave another comment stating you bought a pack, please!)
Brights:
Browns:
I will post the winning name Monday evening!
Thanks for stopping by and visiting my space, be sure to comment and then head on over to Anita's blog - have fun!
At the Frilly and Funky Blog they are having a challenge to use Kraft and Twine on your project so I am linking up with them there.
My blog friend Becky Shander sent me a beautiful Scrabble tile pendant which was wrapped in a little bag she made out of batting and interfacing. I cut the little bag apart, made my bird out of the batting and wove the interfacing in with the kraft lunch bag paper, vintage book paper, twine, and dress pattern paper I used to make the nest.
The chicken wire stencil is by Balzer Designs for Crafter's Workshop applied with Staz On ink in three different colors. The tree limb is Neocolor II crayons, the leaves are paper scraps. The flowers are acrylic paint by Making Memories applied with punchenella and bubble wrap. Highlighting is done with Faber Castell Pitt artist pens. The word Spring is a rub on by Making Memories. The base is a hardcover book with Golden white gesso over the pages. I used ModPodge to apply all of the elements and to seal the page.
If you think you'd like to try using vintage book paper on your projects see my post here to buy an awesome variety pack to get you started!
I've put together a wonderful bundle of vintage book paper for you! It contains more than 50 sheets in a wide variety of papers to keep you creating for quite a while! (click on photos to enlarge)
What comes in this bundle:
6 sheets of music
15 sheets of 3 column dictionary paper
7 sheets of 2 column dictionary paper
3 sheets of color illustrated children's dictionary paper
22 sheets of book paper from 8 different sources~
(1 in German and 1 in French!)
I've added in some bonus pieces just for fun!:
1 piece of dressmaker's tissue paper
1 illustrated children's book page
1 section of an aeronautical chart (clickhere to see what an awesome background this makes!)
This Fabulous Friday at Frosted Designs we are challenging you to use your punches on your project! I used a heart punch by Martha Stewart to make the flowers on this framed piece:
The background paper is "Jacobean Black" by Autumn Leaves and is mounted on the backerboard that came with the frame. The mini canvases are by Daler Rowney Ltd and are covered with vintage book paper. The flowers are made with papers from the "Victoria Garden" line by Echo Park with center brads by Bo Bunny. Of course, everything has Distress Ink on it by Tim Holtz for Ranger in various colors. The frame is by Pinnacle.
The challenge this week at The Paper Variety is anything other than a card or layout and I am entering this piece in their challenge.
If you think you'd like to try using vintage book paper on your projects see my post here to buy an awesome variety pack to get you started!
This week's prize for one random winner at Frosted designs is an adorable mini album kit by Artsy Albums. So get out your punches, make a layout, card, or off the page project andlink it up at Frosted Designs!
Today I am sharing a new spread in my art journal on which I used three stencils by Balzer Designs for Crafter's Workshop (Mini Zinnia, Mini Flower Garden, and Hexagon). The Frilly and Funkie Challeng Blog has a challenge going on right now to use stencils on your project and I am entering this spread there. The tree branch with flowers is also a stencil. It is made by Delta Creative.
This side is the back half of a butterfly which, when opened will have Zentangle patterns on it which I haven't completed yet. The butterfly is cut out of the books pages so the background you see is actually the page previous to the butterfly pages. This portion of the butterfly has a base of scrapbook paper with gesso over it. The stencils are done with Pan Pastel and Staz-on ink. The bird at the bottom is stamped with Ranger Archival ink on a stamp by Inkadinkadoo.
The base on this side is a napkin with a petal edge. The hexagons are a Balzer Designs stencil done with Staz-on Ink. The tree branch and flowers are acrylic paint mixed with modeling paste. The flower centers are Ranger Perfect Pearls. There are various stamps for texture and the title stamp is done with letters by Close To My Heart.
When I was working in the skilled nursing facility at our local senior community I noticed that in the activities area there were puzzles, coloring, yarn lacing, and other activities for the residents to do that are at the skill level of the residents. Unfortunately at that skill level, they are very much geared to children. I live in a Mennonite community, so many (actually most!) of the female residents in the SNF grew up with quilting as an integral part of their lives. I have many co-coordinating paper scraps and came up with the idea to use them to make an activity related to quilting for the ladies to work on in the activities center!
I cut 4 1/2" by 1 1/2" rectangles and 1 1/2' squares out of my paper scraps, mounted them on chip board, and glued a magnet on the back of each piece. I found a 14" square magnet board in the school supply section (unfortunately blue was the only color they had). The pieces are large and easy to handle but because of the magnet on the back, they stay put and can be manipulated without them getting away!
I made lots and lots (and lots) of these pieces
and then I lost interest in the project :(
(or perhaps had too many other projects to do!)
When Frosted Designs came up with this challenge, it gave me a renewed interest in the project! In playing with the pieces I discovered that I need to make more (lots more) pieces and I need to make some that are 3" square. Not to worry - I still have a huge amount of scraps! I really think the ladies at the senior community will have fun making "quilt blocks" and it should stimulate lots of good conversation as well.
The other designers at Frosted Designs have come up with beautiful projects to inspire you, so hop over and check them out! Make a quilting inspired project of your own and link it up for the opportunity to win a great prize!
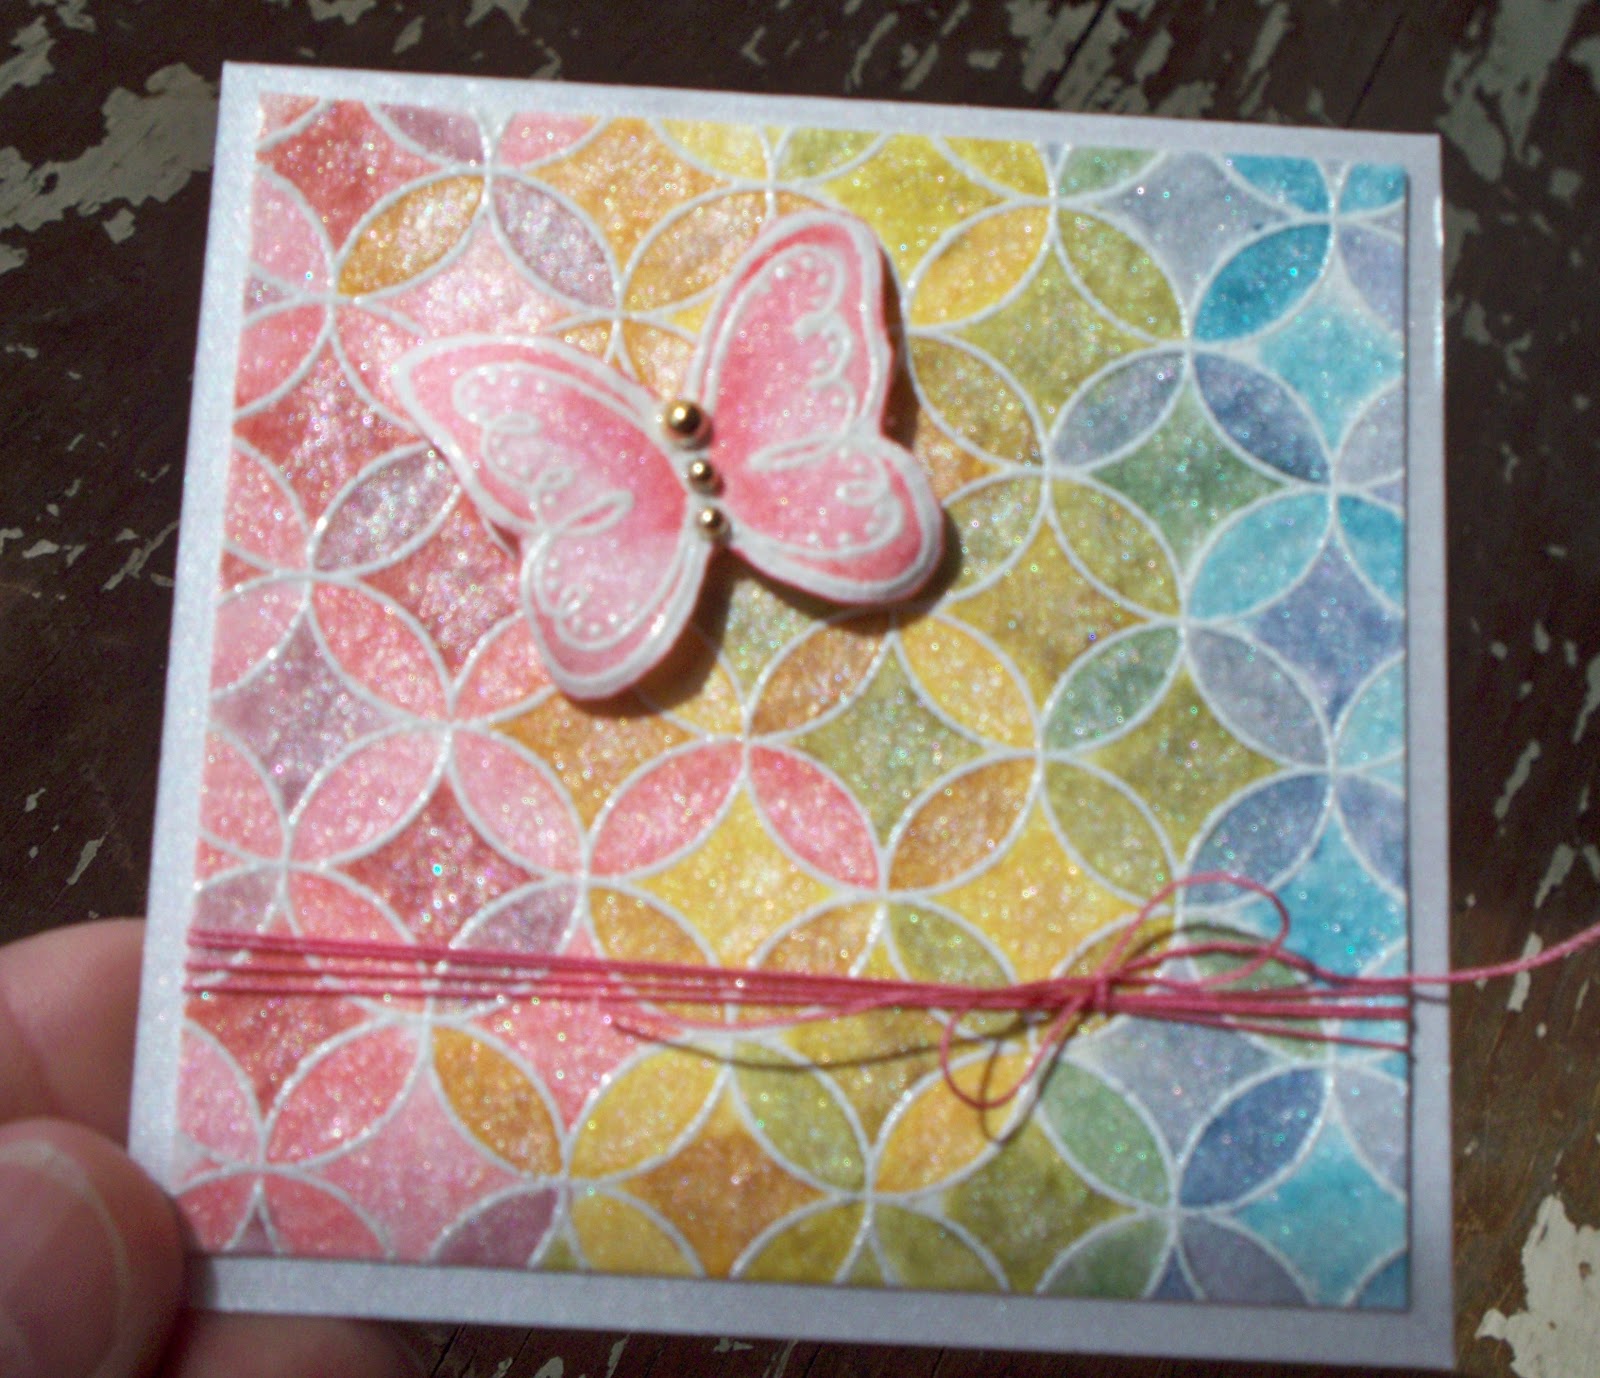
I saw a tutorial by Jennifer McGuire and had to give it a try. I am thrilled with the result and can't wait to try it again with different stamps.
I started with Strathmore Watercolor paper, stamped it with VersaMark on a Studio G stamp. Embossed it with white Zing embossing powder, colored in the spaces with Tim Holtz Distress Ink markers, then sprayed it with Perfect Pearls Mist in Biscotti. I used the same process to make the butterfly using a stamp by Inkadinkadoo. The crochet thread is vintage, the gold pearls are by Recollections and the white base is by Bazzill. The final size of the card is 3" x 3".


 sandee said...